


Biopen Bio4 Derma Stamp

£37.99
Discover the power of the Biopen Bio4 Derma Stamp, now available at Dr. Pen UK.
This next-generation derma stamp includes two interchangeable heads—one with 120 pins and another with 64 pins—for versatile, targeted treatments
Order now for estimated delivery on 29, September 2025
In Stock
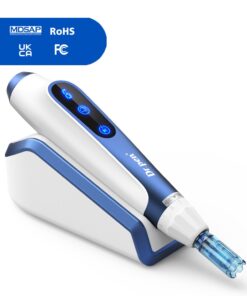
The Brand New Bio Pen Bio4 Derma Stamp Now in Stock at Dr. Pen UK
Discover the power of the Biopen Bio4 Derma Stamp, now available at Dr. Pen UK. This next generation skincare tool features 2 seperate stamp heads(120 pins and 64 pins) with medical-grade needles, protective caps and an adjustable depth gauge—up to 3.0 mm—for personalized treatments.
Key Benefits of the Bio 4 Derma Stamp:
-
Diminishes the appearance of scars
-
Reduces the look of stretch marks and cellulite
-
Softens fine lines and wrinkles
-
Evens out skin tone and improves discolouration
-
Stimulates hair and beard regrowth while combating thinning
-
Enhances the absorption and effectiveness of your skincare products
By encouraging natural collagen and elastin production, the bio 4 Stamp helps revitalize your skin for a smoother, firmer, and more radiant complexion

How to Use a Derma Stamp
Step 1: Choose and Set the Needle Depth
Select the needle length that suits your treatment area, then adjust the depth using the dial on your derma stamp.
Step 2: Disinfect Your Derma Stamp
Soak the derma stamp in 70% isopropyl alcohol for 5–10 minutes to sterilize it before use.
Step 3: Cleanse Your Skin
Double cleanse the skin, remove any makeup dirt and oil, then wash your face thoroughly with a gentle cleanser to ensure skin is clean. This helps reduce the risk of bacteria transferring to the skin during treatment.
Step 4: Begin Stamping
Gently press the derma stamp into the area you want to treat, working in small sections.
-
Do not overstamp the same area.
- Apply a serum, suitable to target the skin concerns you wish to address.
-
Maintain a consistent pressure and pace for optimal results.
Step 5: Rinse Your Skin
After stamping, rinse the area with clean water.
Step 6: Apply Serum
Apply a serum to take advantage of the open micro-channels. Choose one that’s hydrating and soothing—hyaluronic acid is a great option. Lock in the skincare with a soothing sheet mask.
Step 7: Clean and Store the Derma Stamp
-
Wash the stamp with unscented soap.
-
Disinfect it again by soaking in 70% isopropyl alcohol for 10 minutes.
-
Dry and place it back in its case, storing it in a clean, dry area.
Step 8: Post-Treatment Skincare
Stick to a simple, soothing skincare routine after treatment:
-
Avoid harsh ingredients like retinoids, AHAs/BHAs, salicylic acid, or benzoyl peroxide.
-
Use a gentle cleanser and a nourishing moisturiser to support skin recovery.
Important Note:
Inspect the needles before each use. Replace the derma stamp once the needles feel dull—typically after around 10 uses.

Depth and Needle Length Guidance
0.20-0.25mm = Better skin care absorption. Improving your skin condition. Very fine lines around sensitive areas.
0.3-0.5mm = Better skin care absorption. Improving your skin condition. Very fine lines around sensitive areas. Eradicate potholes of dirt or dead tissue. Skin whitening and lifting. Prevent hair loss.
0.75-1.0mm = Remove light wrinkles on the face and around the eyes. Rejuvenate under eye area. Acne scaring and light pigmentations.
1.5mm = Remove deep wrinkles and scar. Improve sun damage pigmentations.
2.0mm = Remove Small injury scars & acne scars.
Please note that any needle above 1.00 is recommended for professional usage only.
How Often Can I Use A Derma Stamp?
How often you use a derma stamp depends on the length of needles you’ll be using. Below is a guide for each length:
Needle length (millimetres) Frequency
0.25 mm Every 2-3 weeks
0.5 mm Every 3-4 weeks
1.0 mm Every 4-5 weeks
1.5 mm Every 4-6 weeks
2.0 mm Every 6 weeks
- Derma stamping is best performed in the evening.
- Ensure your skin is completely recovered before starting another session
DO NOT USE
- On open wounds
- On acne or irritated skin
- If irritation occurs
If in doubt contact your dermatologist
Related products


Derma Stamps

Hair Growth


Derma Stamps

Derma Stamps


Serums


Serums


Serums


Hair Growth


